|
|
|
But I'm still leagues better than you." -Weiss to Ruby, RWBY The Emerald Forest Pt.2 facebook • deviantart • twitter tumblr • weibo • curecos • worldcos youtube • soundcloud • ask.fm • instagram MAORA. October 18th. Libra. Asian. Otaku. Sarcastic - Outspoken - a bit Psycho - Dense. Adores music and japanese entertainment. Speak Indonesian, American English and Japanese. Loves      

Archives
Ask.fm
 NO.6 Interactive Novel Project on TUMBLR! |
[TUT] Photo Retouch: Sweet Sweet Dream
written on June 14, 2013 ✈
Hello readers! For some reason I'm kinda in the mood of making a tutorial regarding my post about PSD Template. I decided to tell you how to maximize its use. It turns out to be a Photo Retouching and Editing Tutorial. And so... Well, this sure is one hell of a tutorial. It also made for you who doesn't really familiar with using photoshop... so yeah it will be a little long and detailed. 我慢してくださいね。 FYI I'm not one of those professionals. It's just kinda hobby and I'm just sharing how I do things :) correct me if I'm wrong and you can do some experiment on your own and be more creative than me! .....それではTutorialスタート! 1) Choose a photo. Absolutely you need one. 2) Retouching! There always be flaws that even a make-up can't hide. This is where photoshop wins. 知ってるでしょ? Nanami Haruka doesn't even have a single mole on her face so we're gonna brush it away with STAMP Tool. See the picture below.  You don't even need to take an area sample. Make sure you use a regular basic brush before clicking on the flaws spots, and you can see the difference.  3) Remove the GRAIN by doing Filter > Noise > Reduce Noise..  You'll see it become a bit blurry but we can always work on it later  4) TONE time! I'm using my own PSD Template you can download it here. Just drag the layers/folder. The result will depend on the photo itself. Mine is not going to just the way it is because I think it's still too yellow-ish, and I want it to have more dreamy feeling. 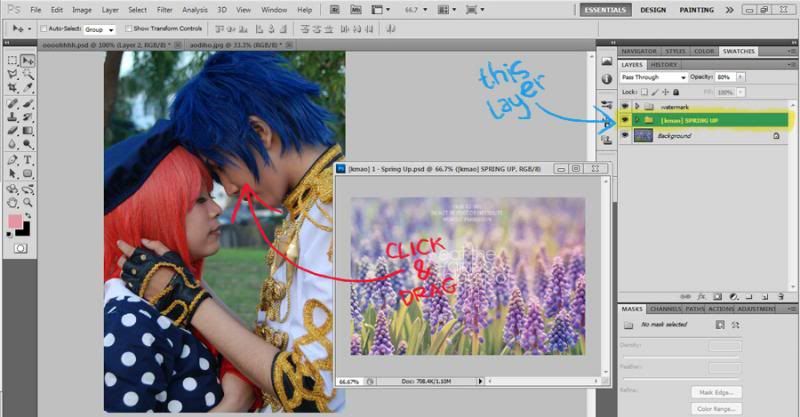 5) Lighten and brighten it using (1) Levels. Set it to around this number or as you pleased: 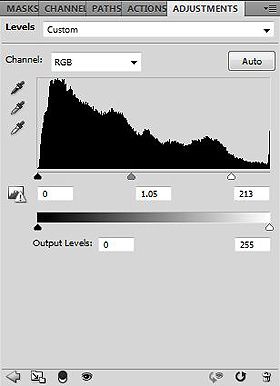
Then set the Blending Mode into this: 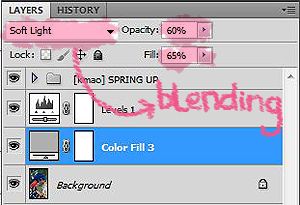 After this we'll be having a little fun with the lights ♥ 6) Add BOKEH texture. You can make your own texture or you can just download it. I think the one from a photograph is still better than the one that photoshop-made. Here's some example: 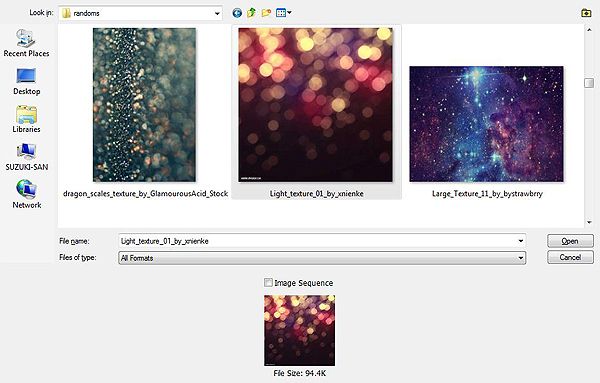 and adjust it like you want. 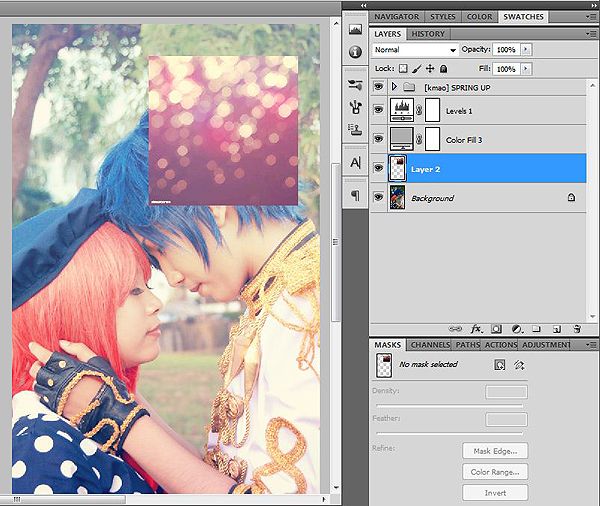
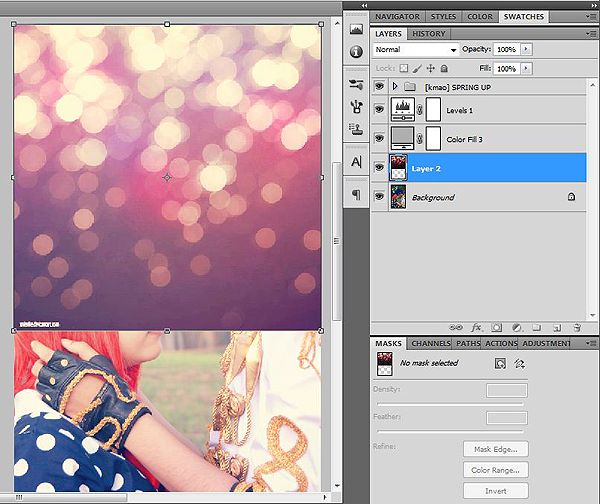 7) Now change the Blending Mode into Screen and set for the Opacity: 75% and Fill: 70% like in the picture. Actually you can adjust it to match your taste. And as you can see below, ain't the result is already pwetty? キラキラしてますよ♥ 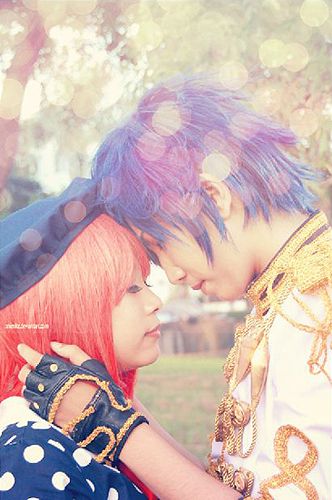 8) Eventhough it's already look pretty it's not finished yet. You won't like it to have a watermark sign or the light goes to places you don't want. So use the ERASER Tool (press E) to... well, erase, the parts that you feel disturbing. Better erase it using the round and feathered basic brush  so it will look natural than just cutted short. so it will look natural than just cutted short.Mine turns out like this: 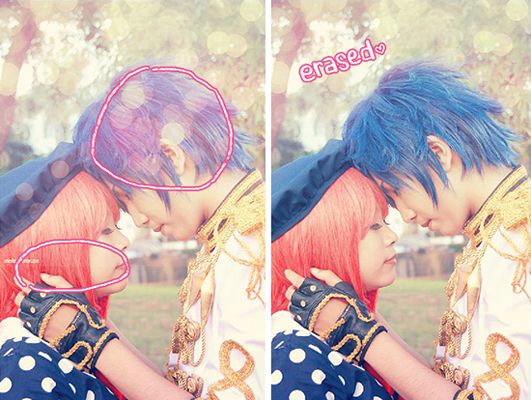 9) And as the perfectionist I am, I'm not satisfied with the result because the background in the middle looked a bit unnatural. So I made a new layer (press SHIFT + ALT + N). Using BRUSH Tool I add some light bulbs using colour #FEF9E9 (very soft yellow) on the areas I found lacking of lights: 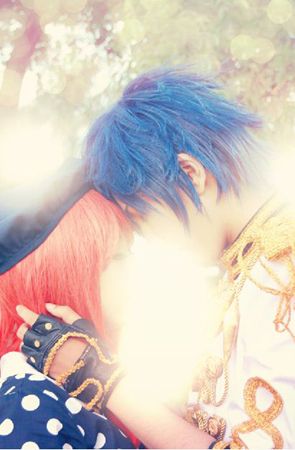 Then set the Blending Mode into Soft Light, Opacity: 36% and Fill: 30% or just how you like it to be: 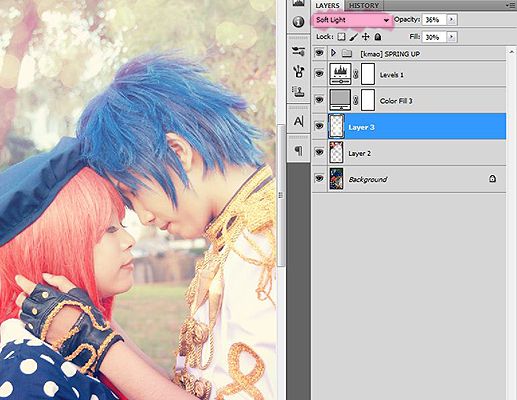 10) We're almost finish! I merge all the layers by pressing CTRL + SHIFT + E. The action called "Merge Visible" because it will merge all the layers you activate. NOTE: Just the activated layers. 11) Now we just need a little bit of retouch, since the image is still kinda blurry and very brightly soft. Since all the layers are now merged, we'll work with emphasizing some dark parts by choosing the BURN Tools: 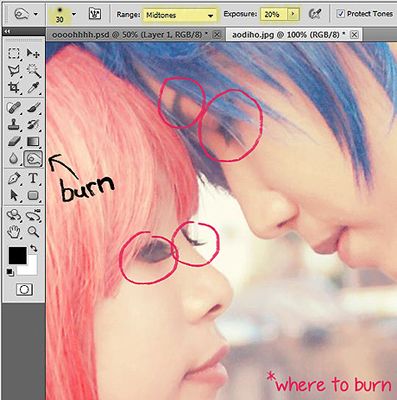 12) Finally I'm going to add some more sharpness by using Filter > Sharpen > Unsharp Mask.. and set it around this number: 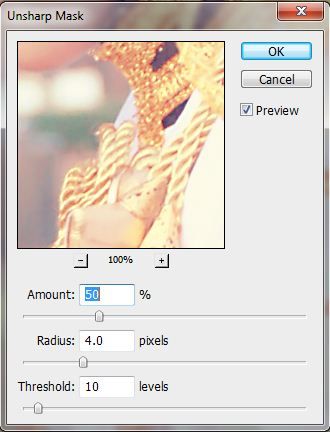 IT'S DONE ♥ You can view the result here. Umm it's not much.. since I was just trying to make a medium quality photo looks better. If even possible, looks a lot more better. Hope it somehow helped. And sorry for mixed language 1 comment[s] | back to top |